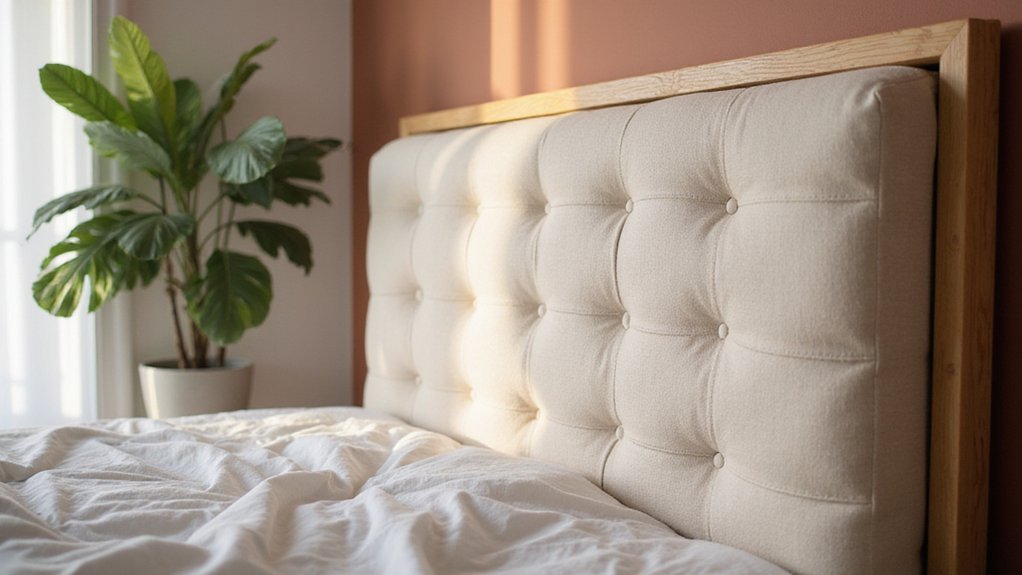
Ever wonder how to create a stylish, custom headboard without breaking the bank? You can craft a queen-size upholstered headboard in just one weekend for under $150, using simple tools and materials.
With a step-by-step approach, you’ll be able to customize your bed’s look and save hundreds in the process. Keep reading to see how easy it really is.
Gather Your Materials: Plywood, Foam, Fabric, and Stapler
To create your upholstered headboard, gather four key materials: plywood, foam, fabric, and a stapler. For a queen-sized headboard, use 1/2-inch plywood, which provides a sturdy base, or opt for 5/8-inch MDF for heavier, more durable use. Have the store cut the plywood to your desired dimensions at no extra cost. Ensure the plywood is cut to the exact queen dimensions of 60 inches wide by 80 inches tall for a perfect fit with your bed frame.
Next, get 2-inch high-density foam, trimmed precisely with a Stanley knife to fit your headboard size. Apply spray adhesive to both the plywood and foam, then allow it to dry completely—the glue will secure the foam firmly in place. Before cutting, measure the window frame to ensure the foam fits without gaps, similar to how you would size a window air conditioner. For a king-sized headboard, note that a king mattress is 76 inches wide, so you would adjust your plywood width accordingly.
You’ll also need 2 yards of fabric, which should be ironed beforehand to remove any wrinkles for a smooth finish. Additionally, gather 4 yards of extra-loft batting, adding a few extra inches on all sides to aid in wrapping and securing the material evenly.
Finally, a heavy-duty staple gun is essential for attaching the fabric and batting to the plywood frame. Before upholstering, plan your wood finishing to protect the back of the headboard and ensure a clean look. For easier cleaning and added longevity, select a durable, stain-resistant fabric for your cover. When stapling, start from the center of each side and work outward toward the corners, pulling the fabric taut to avoid wrinkles or sagging.
Cut Foam, Batting, and Fabric for Your Queen-Size Headboard
To cut the foam, batting, and fabric for your queen-size headboard, start with precise measurements to achieve a professional look. For foam, trace your plywood outline onto the foam, then cut along the lines using a utility knife or electric carving knife for clean edges. For a queen-size headboard, slightly round the top three corners to give a smooth, finished appearance. Ensure the foam thickness is compatible with standard crib mattress dimensions if repurposing for a nursery setting, as this ensures safe sleep practices for infants. For long-lasting freshness, consider applying a gentle fabric protector to down alternatives used in the foam layer.
When preparing the batting, cut it so that it extends 5.5 inches beyond the plywood on each side. This extra length accounts for the 2-inch foam layer and ensures full coverage. Additionally, leave about 8 inches per side to wrap around the edges smoothly. Keep a border of 6 to 8 inches around the perimeter for wrapping and stapling. For smoother finishing, cut corners in a “J” shape before folding and stapling.
For the fabric, add 12 inches to each side of the headboard dimensions to allow for fitting and securing. Trim the fabric to follow the shape of the headboard, making sure you have a 6-inch overhang from the edges. When layering, place the fabric right-side down on a flat surface, then add the batting, foam, and finally the plywood. Secure each layer with staples, starting from the center and moving outward for a smooth, tight finish.
Attach Foam to Plywood the Quick Way
To attach foam to plywood quickly and securely, start by applying a fast-bonding adhesive, such as PL foamboard adhesive. This allows you to proceed without long drying times. Before gluing, scuff the foam surface with a wire brush to enhance adhesion. Use proper foam cutting techniques to ensure the piece fits precisely, reducing misalignment.
Apply a bead of glue along the foam’s edge, then press it firmly onto the plywood. Slightly slide the foam to distribute the adhesive evenly across the surface. To achieve an even coat, use a makeshift putty knife or a plastic scraper—this boosts bond strength and minimizes glue use. To speed drying, punch a small hole in the foam to allow air circulation to the adhesive from one side. For larger adhesive applications, applying the glue in an “SS” pattern promotes air flow and more efficient drying. When choosing your project base, consider that platform beds often provide a simpler and more affordable foundation for a headboard than traditional frames.
If you encounter adhesion issues, consider using a stronger adhesive like Gorilla Glue or a spray adhesive with at least 75 percent overlap coverage. To hold everything in place while the glue sets, place a weight, such as a stack of magazines, on top overnight. Allow at least 24 hours for the bond to fully cure before handling or moving the piece. For a durable final look that matches other bedroom furniture, consider using a queen wood bed frame as the base for your upholstered headboard. When planning the headboard size, note that a Cal King mattress is narrower than a standard King, which can affect the plywood dimensions needed for a proper fit.
Pull Batting Taut for Wrinkle-Free Results
Pull the batting taut from the center to the edges, starting at the bottom middle of the headboard. Staple it to the back, then continue wrapping along the bottom edge. Maintaining consistent tension is essential for wrinkle prevention. As you move the staple gun, pull firmly but evenly to keep the batting smooth. For a flawless finish, use a quilt pattern beginner approach to check for even tension across the surface.
At the top, pull the batting up and around to avoid creases. For corners, use diagonal tension with hospital-fold precision—this eliminates bulges. Keep the batting taut all the way through, checking underneath to ensure it lies flat. If you notice a wrinkle, pull it out before stapling the top edge. A twin mattress in inches measures 38 inches wide and 75 inches long, which helps confirm the headboard’s final dimensions.
Staple the batting every 2 inches along the back to secure it evenly. Focus on achieving a smooth, drum-like surface; rushing may cause wrinkles. Later, trim any excess batting, but for now, prioritize consistent, tight tension to ensure a wrinkle-free finish.
Wrap Fabric Around Your Queen-Size Headboard
Once you’ve positioned the headboard face-down, gather a piece of fabric at least 7 inches larger than the headboard on all sides. Pull the fabric taut from the center outward to ensure even tension across the surface. Begin stapling at the middle of the top edge, then work outward toward the corners. Staple in increments of about 6 inches, alternating sides to maintain consistent tension. Stop stapling approximately 2 inches from each corner to allow for neat folding later. Use your palm and fingers to grip a large section of fabric, stretching it evenly toward the nearest corner. Ensure the fabric remains smooth as you work. To help keep the fabric fresh over time, apply the same gentle care principles used for washing weighted blankets. Trim any excess material that extends beyond the middle of the headboard, leaving roughly one inch of fabric to tuck in securely later. For a budget-friendly approach, consider reusing materials like a sturdy metal pipe from a homemade garment rack project. For a more organized space, you might also repurpose a shoe storage rack to hold extra fabric rolls or tools nearby.
Fold Corners Like a Gift Wrap for Clean Pleats
To fold corners like a gift wrap for clean pleats, start by forming a small triangle in the corner. Push the excess fabric from the short side into the corner to create this triangle—this step is essential for neat, precise pleats. Then, pull the fabric from the long side over that folded corner while maintaining tension. Make sure the fabric edge lines up with the back and top of your headboard panel. Hold everything firmly in place and staple the folded fabric to secure the corner triangle. After completing this step, fold the paper under on one side to align with the edge, ensuring the fabric layers stay flush. For long-lasting freshness, it is also important to wash mattress pads regularly to remove dust and allergens. A duvet coverlet serves as a removable protective layer that simplifies cleaning while maintaining a tidy bedroom aesthetic. Using a humidifier can help protect your upholstered headboard by maintaining consistent humidity to prevent fabric warping or cracking.
The key to a polished look is fabric tucking: smooth out the excess into neat folds instead of fighting with it. Before manipulating the corner, pull the fabric along the long side to get rid of any slack. Tape down the pleated sides first to make folding easier. Fold the top flap down, then fold the sides over, ensuring the fabric remains tight and smooth. Crease sharply at each corner after folding the adjacent side over. This method keeps your corners sharp and tidy, like a well-wrapped gift.
Place Nailhead Trim Straight Every Time
To place nailhead trim straight every time, start by measuring three inches from the outside edge of your headboard before marking your first hole. Use white chalk on dark fabric or a fabric pen on lighter colors to create clear, visible marks. Frequently measure along the strip to ensure consistent spacing and use the foam layer edge as a guide for even placement. While down comforters offer plush warmth, alternative fill materials provide comparable insulation without the animal-based fill. Drive a single nail into the center hole of the first faux nailhead to secure the trim, then press the strip firmly into place. Space each nail so that the heads touch the neighboring nailheads, maintaining uniform spacing throughout. Keep each nail perpendicular to the surface to ensure a clean, straight look. Ensure all edges are smooth to prevent fabric snags, as smooth edges from sanding the plywood help the nailhead trim lie flat against the fabric without snagging. Following a floating bed frame design can provide a stable foundation that keeps the entire headboard level during installation. When approaching corners, stop the strip at the last designated hole, snip close to the nail, add individual nails to turn the corner, then continue with the strip. Leave two or three spaces before each corner to keep the alignment neat and consistent. Often a queen size headboard offers sufficient width to practice these techniques before tackling larger custom builds.
Mount Your Queen-Size Upholstered Headboard Safely
Before finalizing the installation, test the stability of your headboard. Use your hand or a sturdy object to apply firm pressure near each top corner and gently wiggle the headboard. If you notice any movement, it indicates the headboard isn’t firmly secured. To fix this, re-secure with larger anchors or deeper screws to ensure it holds securely. Finally, tighten all bolts with a wrench to lock everything in place, preventing any shifts or wobbling over time.
Save Money by Repurposing Old Mattress Padding or Sofa Fabric
You can reuse old mattress padding or sofa fabric to create a custom headboard, saving money on new upholstery foam. Start by thoroughly cleaning your mattress topper with a vacuum, treating it with an enzymatic cleaner to remove stains and odors, then allow it to air dry completely. Once cleaned, measure your headboard’s dimensions and use an electric knife to cut the padding to size accurately, ensuring smooth edges.
Staple the cut foam onto a wooden panel that fits your headboard frame, making sure it’s taut and secure. Then, cover the foam with your old sofa fabric or another decorative cloth. Fix the fabric firmly in place with a staple gun, pulling it tight to avoid wrinkles. You can add extra flair by incorporating small foam scraps on top of the larger padding for texture, then finishing with tufting or nail heads for a polished look. This approach repurposes materials you already have, helping you cut costs while adding personalized style to your bedroom décor.