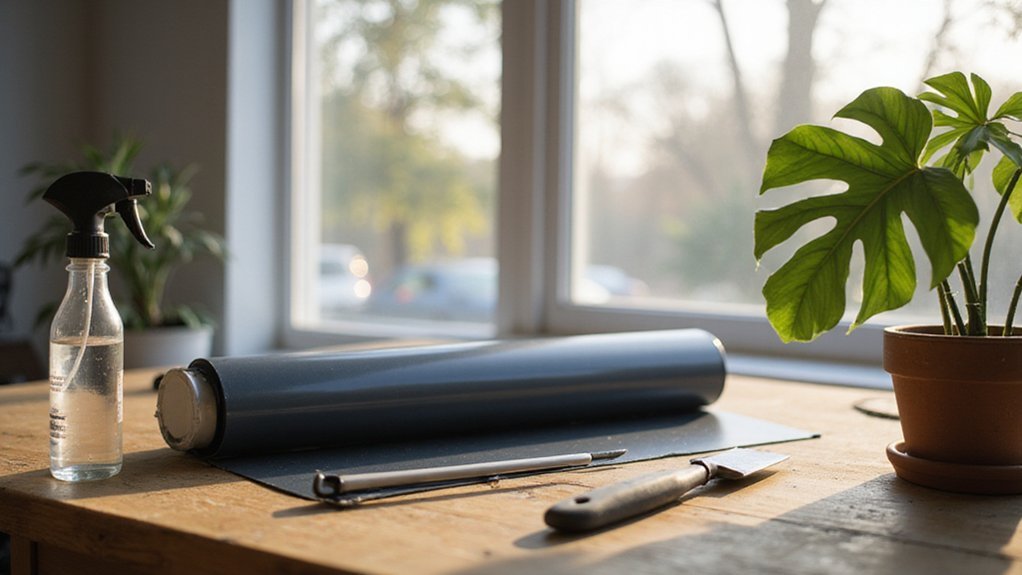
Want to get your windows nicely tinted but not sure how to start? It’s easier than you might think, and with the right step-by-step process, you can achieve a smooth, professional-looking finish.
Proper preparation and patience are key, along with knowing how to handle the film and tools for the best results. Keep reading for a simple guide to help you through the setup.
Every Tool You Need for Window Film Installation
To achieve a clean, bubble-free window film installation, you need the right tools. Start with a precision utility knife and snap-off blades for making clean cuts without tearing the film. A measuring tape is essential for getting accurate glass dimensions, while a grease pencil allows you to mark a line that’s one inch larger than the glass to ensure proper coverage. For reference, knowing the exact queen mattress dimensions can help you properly size a window film for a matching bedroom window.
For smoothing out the film, use a large handled squeegee with a soft blade to remove air bubbles. A corner and edge tool help press the film into tight spots and corners. A pump sprayer filled with distilled water—sometimes combined with a few drops of dish soap—creates the mounting solution needed for easy positioning.
When working on curved edges or intricate details, a heat gun is invaluable for softening the film, making it easier to mold into shapes. A tucking tool helps slide the film into seals and grooves, ensuring a sleek finish. A shrinking card is also useful for curling the film into tight curves without distortion. To prepare the glass surface, use a blue scrub pad and a razor blade scraper to remove dirt and grime.
Finally, keep towels handy to catch drips and protect your floors. Together, these tools form the complete kit needed for a professional-looking window film installation.
How to Prep the Glass for a Smooth Film Application
To ensure a smooth film application, proper glass prep is essential. Start by inspecting for vinyl frames or rubber gaskets around the window, and remove dust from sills to prevent contamination from washing back onto the glass. Spray the entire surface generously with soapy water—using a solution made of one teaspoon of baby shampoo per gallon of bottled water—until the glass beads and water begins to run. This wetting layer helps the film adhere smoothly and reduces the chance of air bubbles or wrinkles. Be careful to measure the window opening accurately, as incorrect sizing is a common mistake to avoid during installation. A similar principle applies to bedding, where a duvet cover protects the inner duvet and allows for easy cleaning without removing the entire comforter. Just as a full mattress provides a cozy sleeping space for a single person or small bedroom, proper film application requires a clean, well-prepared foundation.
Next, scrub the glass with a glass-safe pad to loosen grime and particles. Drag a single-edge razor blade across the wet surface, applying gentle pressure while listening for a clicking sound, which indicates the removal of invisible paint specks or debris. Keep the blade sharp and replace it frequently to maintain effective cutting power. After scraping, squeegee the glass dry, wiping the blade with a non-linting towel after each pass to avoid streaks or streaking. Additionally, for older windows, address accumulated grease and grime in corners and edges using a brush or cleaning tool before final wiping.
Finally, finish by toweling the entire surface with a microfiber cloth. This helps remove any remaining water and lint, leaving the glass perfectly smooth and clean, ready for film application. Properly wet and clean glass significantly improves the chances of a bubble-free, flawless installation.
Rough-Cut and Fit the Film Before Peeling the Liner
Start by measuring the glass accurately, then unroll the film onto a clean, flat surface. Slightly roll down the window to create a small gap, allowing for precise cutting along the top edge. Use a sharp knife with multiple blade clips to make one smooth, continuous cut across the top of the glass. Avoid stopping midway, as this can ruin the clean line. For DIY installation, this process saves over $100 compared to retail installed tint. Cut the film at least one inch larger than the glass on all sides, adding an extra 20mm to both height and width for trimming after application. This extra margin helps prevent accidental cuts into paint or rubber surfaces later on. Position the oversized film on wet glass with the liner facing you, ensuring the entire glass is covered with a slight overlap on every edge. Following a safe step-by-step approach prevents errors during alignment and trimming. Don’t peel off the liner yet; just align the film properly. Manually smooth out any large air bubbles but reserve the final squeegee step for later to achieve a bubble-free finish. When choosing the right type of film for your space, consider that LED lighting typically offers better color rendering and energy efficiency than fluorescent bulbs, which can influence how the tinted film appears after installation. This careful alignment process mirrors the precision found in beginner quilt making kits, where accurate cutting and fitting are essential for a professional result.
How to Separate the Window Film and Liner Without Touching the Adhesive
To separate the window film from its liner without touching the adhesive, start once you’ve rough-cut and positioned the oversized film on the wet glass. Use tape to achieve clean liner separation; press a piece on each side of a corner, slightly offset, then pull them apart. This method is one of your best tool hacks—no direct hand contact needed. If tape isn’t available, pinch the corner with a squeegee and lift the edge with your fingernail. Using two people can make this easier handling possible during the initial lifting phase.
Spray the exposed adhesive liberally with a soapy solution as you peel. This prevents the film from sticking to itself and makes separation easier. Avoid using your teeth, as it’s unprofessional and risks creases. Instead, pre-attached tabs or folded cellophane tape can provide reliable grips. Press tape down firmly to prevent it from failing on the first pull.
Keep the adhesive wet throughout the process to maintain smooth separation. Staying consistent with moisture levels minimizes sticking and helps you peel cleanly without damaging the film or liner.
How to Wet, Align, and Slide the Film Into Place
To wet, align, and slide the film into place, start by spraying both the exposed film and the glass with a soapy solution until they’re fully slick. This step is essential for surface preparation, preventing the film from sticking prematurely. Avoid spraying the edges of the glass, as this can interfere with precise alignment.
Begin by aligning the top edge of the film first, then adjust it horizontally to center it. For large windows, enlist a helper to manage the film more accurately. Carefully lower the cling onto the wet glass, applying gentle pressure to minimize bubbles.
While both surfaces remain slippery due to the soapy layer, you can slide the film freely to fine-tune its position. Once satisfied, press gently from the center outward to smooth out any remaining bubbles. The soapy solution holds the film in place immediately, giving you control without rushing. Keep the adhesive side damp throughout the process to prevent the film from sticking in unintended spots. Use a “smoothie” squeegee to push water outward for better adhesion during final smoothing. For best results, avoid harsh chemicals or abrasive tools that could damage the film surface, similar to the gentle cleaning methods recommended for mini blinds. Addressing excess moisture during installation helps prevent mold growth behind the film. Always wipe away any excess solution that seeps out from the edges to ensure a clean, professional finish.
Squeegeeing Tricks to Remove Bubbles and Lock Down the Edges
To remove bubbles and lock down the edges effectively, you need to master specific squeegee techniques. Start by selecting a medium-firmness squeegee with a blade measuring 3 to 4 inches. Make sure the urethane edge is cut sharply straight for smooth contact. For bubble removal, begin at the center of each bubble and squeegee outward toward the nearest edge. Use slow, deliberate strokes at a 30 to 45-degree angle, applying medium pressure—never push directly toward the center.
If you encounter stubborn bubbles, warm the film to 120-130°F using a heat gun. Immediately squeegee while the adhesive remains pliable to push out the bubble. To lock down the edges, warm the perimeter of the film first. Then, use a smaller squeegee to press the film firmly against the glass, starting from the center and moving outward toward the frame. Overlap your strokes by 20 to 50 percent to ensure even coverage. Remember to wipe the blade clean after each pass to prevent debris from scratching the surface. Emphasize edge stretching and double shrinking during application to ensure the film adheres tightly without lifting. For best results, follow a careful cutting process as recommended in quilting guides, ensuring precise measurement before trimming. Using budget-friendly materials from a standard lumber list can help you build a stable support frame to practice your film alignment before final installation.
Final Trim and Cure Time: What to Expect the First Week
After locking down the edges with your squeegee, you’re ready for the final trim and curing process. Precise edge trimming is essential to remove excess material, preventing interference with window mechanisms and creating a sealed boundary that holds moisture during curing. Be careful not to over-trim; exposing the adhesive can cause peeling, while under-trimming may catch film in the channel, leading to issues later on. Similar to how a queen mattress balances space and cost for most bedrooms, proper edge trimming balances film coverage and functional clearance. You should maintain a steady hand and use a sharp blade to achieve a clean cut, much like how picture hangers require careful alignment for a secure hold. Just like choosing the right duvet coverlet material affects comfort and breathability, selecting the correct blade angle prevents common trimming mistakes.
Don’t worry if you notice water bubbles, haze, or streaks—that’s normal and usually fades within 24 to 48 hours. Avoid pushing bubbles around or applying heat, as these actions can disrupt the adhesive’s natural bonding process. Keep your windows rolled up for at least 48 to 72 hours to support adhesion, but waiting three to five days is even safer for optimal results. The curing time varies depending on your film type and environment: dyed films generally cure in 2 to 3 days, ceramic films in 5 to 7 days, and full bond strength can take up to 30 days. The best conditions for curing are temperatures between 70°F and 100°F with low humidity, ensuring the film cures properly and bonds securely over time. This settling time is also when trapped moisture and residue dry out, which can cause white spots and streaks to appear days later.