Thinking about how to wash your comforter without damaging it? It’s easier than you might think—using a large front-load washer with at least 4.5 cubic feet capacity and following a few simple steps can keep it fresh and fluffy.
Proper pre-treatment, gentle washing, and careful drying are key to maintaining your comforter’s warmth and softness. Keep reading for all the details you need to get it just right.
Choose a Large-Capacity Front-Load Washing Machine
Choose a front-load washer with at least 4.5 cubic feet of capacity. This size ensures your king-size comforter can move freely during the wash cycle, allowing for a thorough clean. Larger capacities also mean fewer loads, saving you time and effort. When handling bulky items like comforters, higher spin speeds improve moisture extraction, which shortens drying time significantly. To keep your washer in top condition, always check the drum for leftover water or lint after each cycle to prevent mold buildup. Use only high-efficiency (HE) detergent formulas—about two tablespoons—since front loaders use less water. Overusing detergent can cause poor rinsing, residue buildup, and potential damage to your machine. Sticking to a 4.5 cubic feet or larger capacity guarantees ample space for large or bulky loads, ensuring their fabrics are cleaned thoroughly and evenly. A common mistake is failing to level the washer properly, which can cause excessive vibration and noise during the spin cycle. A queen-size comforter will fit comfortably in a washer of this size, as it closely matches queen mattress dimensions for a snug, effective clean. To understand how size compares, remember that a queen mattress provides ample space for couples but is narrower than a king, affecting how bedding fits and performs in daily use.
Pre-Treat Stains Before You Wash This Way
Identify the stain type first. For sweat marks, make a paste of non-chlorine booster and warm water, then soak overnight. Set-in stains respond well to a mixture of baking soda and water applied as a paste or white vinegar left on the stain for 30 minutes. For lighter fabrics, hydrogen peroxide can be effective. Oil-based stains benefit most from an enzyme pre-treatment: apply it directly, rub in a liquid enzyme detergent, and let sit for 10 minutes to help break down oils. Use a gentle brush on stubborn spots. Before washing, always check the care label for specific instructions to guide your stain removal approach. Avoid drying the fabric if the stain remains; repeat these steps until the stain is fully gone to prevent it from setting permanently. When selecting a new comforter, you might also consider dressers and chests for storing it properly.
Load the Comforter Loosely for Even Cleaning
Loading your comforter loosely is essential because water needs to circulate freely for even cleaning. Avoid cramming it in; overfilling past three-quarters of the drum can hinder proper agitation. Start by spreading the comforter flat, grabbing all four corners, then fold it lengthwise into three sections. Roll it so it hugs the interior of the drum, which prevents a dense, soap-trapping ball from forming. For reference, a full mattress is typically 54 inches wide and 75 inches long, which means your comforter may be a full mattress size that fits these dimensions and requires careful loading to avoid excess bulk.
Skip the fabric softener entirely, as it coats the fibers and reduces absorbency. Use cool water to protect the fill’s structure. Loosely loading the comforter ensures balanced weight distribution, preventing the machine from wobbling or bunching the filling during agitation. It also allows detergent to rinse out completely, leaving no residue behind. During transfer, avoid crumpling the comforter to set yourself up for even drying later.
Use Cold Water and a Mild, Scent-Free Detergent
Using cold water and a mild, scent-free detergent is the best approach for washing your comforter. Cold water is gentle on fabrics and helps prevent shrinking and damage, making it suitable for all comforter materials. It also stops protein-based stains from setting, ensuring a more thorough clean.
Choose a liquid detergent that is free from fragrances and dyes. Check the ingredients to confirm it is mild and scent-free, which helps avoid chemical residues that can trap odors or coat delicate fibers. Modern cold-water detergents are designed to activate effectively at low temperatures, providing a deep clean without needing hot water.
This method also saves energy and reduces microfiber pollution by minimizing hot water use. By pairing a gentle, scent-free detergent with cold water, you protect your comforter’s fabric integrity and keep it fresh, clean, and free of chemical residues.
Skip Hot Water and Fabric Softener Completely
Hot water should be avoided when washing your comforter because it can damage delicate fabric and set stubborn stains. Instead, opt for cold or warm water to clean effectively while minimizing wear. Hot water can cook protein-based stains into fibers and accelerate fabric deterioration, especially on delicate bedding. For routine washes, cold water is gentle yet capable of removing dirt and oils. Air purifiers can help reduce airborne dust and allergens in the room, improving overall air quality while your bedding dries. Those seeking to convert existing blinds into fabric shades can explore Roman shade DIY methods for a custom window treatment.
Also, skip fabric softener entirely. It can leave a sticky residue that clumps in your comforter, reducing its fluffiness and trapping odors. A better alternative is adding half a cup of white vinegar during the rinse cycle. Vinegar naturally softens fabric and deodorizes without coating fibers or building up residues. This eco-friendly hack helps preserve your comforter’s loft and extends its lifespan, all without harsh chemicals. Use a mild, fragrance-free detergent and avoid all additives to keep your bedding fresh, fluffy, and in top condition. For weighted blankets, always check the fabric care label for specific washing instructions to avoid damaging the fill or stitching.
Run an Extra Rinse Cycle to Remove All Soap
Run an extra rinse cycle to ensure all soap is fully removed. Most machines offer an “extra rinse” option—use it to double-check that detergent, fabric softener, or alternative cleaning agents are completely flushed out. If your machine lacks this feature, run one more full cycle without adding any soap or softener.
Removing the comforter between cycles allows you to reach hidden spots and distribute water evenly. Use cold or warm water on a delicate setting to protect fibers. Finish with the fastest spin cycle to extract moisture without damaging the fabric. This extra rinse prevents soap residue from causing clumping, stiffness, odors, and skin irritation, keeping your bedding fluffy and comfortable. An extra rinse also helps prevent fabric distortion, similar to the careful handling advised when elevating a crib mattress to avoid sagging or uneven support. Unlike microfiber sheets, cotton sheets may require more careful handling to avoid shrinkage during this extra rinse step.
Dry on Low Heat With Tennis Balls for Fluff
Dry your comforter on low heat, setting the dryer temperature below 55°C. Maintaining a low heat prevents damage to down and synthetic fibers, which can break down at higher temperatures—down begins to degrade above 60°C, and synthetics lose their crimp memory at 70°C. This careful temperature control helps your comforter dry faster while allowing the fibers to regain their fluffy appearance. For those just starting with quilting, beginner quilt making kits offer a simple way to practice similar fiber care principles. A duvet coverlet provides an extra layer of protection, keeping your comforter clean and reducing how often it needs washing. Selecting a best comforter for full bed can also simplify maintenance by ensuring a better initial fit.
Add two to three clean tennis balls to the dryer along with your comforter. The bouncing action of the tennis balls helps break up clumps, prevent bunching or twisting, and gently separate the fibers. This promotes even fluffiness and restores your comforter’s soft, voluminous texture. Ensure the tennis balls are non-marking, free of logos, scuffs, or worn surfaces, as damaged balls could melt and harm both your comforter and your dryer drum.
Run the dryer for 60 to 90 minutes in total, checking the comforter every 20 minutes. Feel for evenness and springiness—your goal is a comforter that feels uniformly fluffy, not stiff or overly stiff. When properly dried, it should regain its original loft and softness, ready for use without any lumps or flattened areas.
Stop the Dryer Every 30 Minutes to Shake the Fill
Stopping the dryer every 30 minutes to shake the comforter is essential for even drying and preventing clumping. When you pause, vigorously shake the comforter by all four corners to loosen the fill. Use your hands to break apart any stubborn clumps that have formed. Rotating the comforter 180 degrees and straightening it before restarting helps distribute the fill evenly.
This manual intervention avoids dense, damp balls that can harden and trap moisture. It also restores the comforter’s natural loft and ensures uniform drying from edge to edge. Regular shaking prevents mold and reduces overall drying time, making the process more efficient. Remember, don’t rely on fabric softeners, which coat fibers and inhibit breathability. Instead, pre-treat stains properly before washing for the best results. You can even use a wooden shoe rack to air-fluff the comforter between dryer cycles, as the open slats allow air circulation that helps break up clumps naturally.
If you notice the dryer shuts off prematurely during this process, the motor may be shutting down due to clogged vents causing overheating.
Check for Complete Dryness by Pressing Thick Sections
To confirm the comforter is fully dry, press thick sections firmly with your fingers to test internal temperature rather than relying on surface warmth. Insert your hands deep into the middle, bypassing that deceptive outer shell. If you detect coolness or dampness beneath, moisture remains trapped. Squeeze multiple spots simultaneously—seams and corners tend to be the most stubborn. Damp filling clumps together, so shake the comforter to check for fluffiness; a musty odor also indicates incomplete drying. Never assume the comforter is dry based on external heat alone, as it can give a false impression. Pause the dryer every 20 to 30 minutes, press, and inspect the thickness. If any section feels cool or smells musty, run another drying cycle. Since sensor dry may prematurely indicate completion with bulky bedding, repeatedly sensing or drying is often necessary for large comforters. When selecting a dryer, consider how the initial cost and long-term comfort of your choice compares to other home options. Repeat this process until the entire compressed area feels uniformly warm. When thick sections feel consistent and show no odor, the comforter is fully dry and ready for the next step. Similar to selecting shoe storage for your space, choosing the right drying method depends on weighing cost, comfort, and everyday use. Note that fluorescent bulbs often cost less upfront than LED bulbs, but LEDs provide better long-term energy efficiency and less heat output.
Air Dry Flat in a Ventilated Space as a Final Step
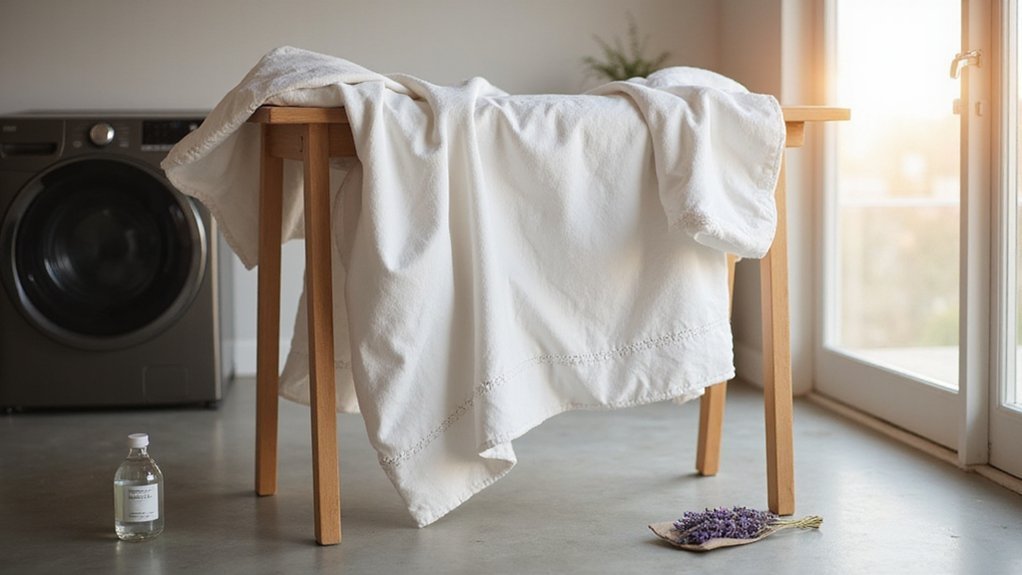
To finish air drying your comforter, lay it flat on a clean, elevated rack in a well-ventilated space. Position the rack near open windows to maximize airflow and place a fan nearby to help cut down drying time, especially in humid conditions. Every 2 to 3 hours, rotate and fluff the fabric to prevent trapped moisture and ensure even drying. Expect the process to take about 4 to 6 hours in low humidity or up to 1 to 2 days indoors when humidity is higher. Avoid direct sunlight since it can cause fading. Before storing, press thick sections to confirm the comforter is completely dry, preventing mold and mildew growth. For faster results, run a Vicks dehumidifier in the room to actively reduce moisture in the air. An elevated rack designed as a storage bin rack can also be repurposed here for supporting the comforter while allowing airflow underneath. For smaller comforters, a single or twin mattress can be used as a flat drying surface if you do not have an elevated rack.