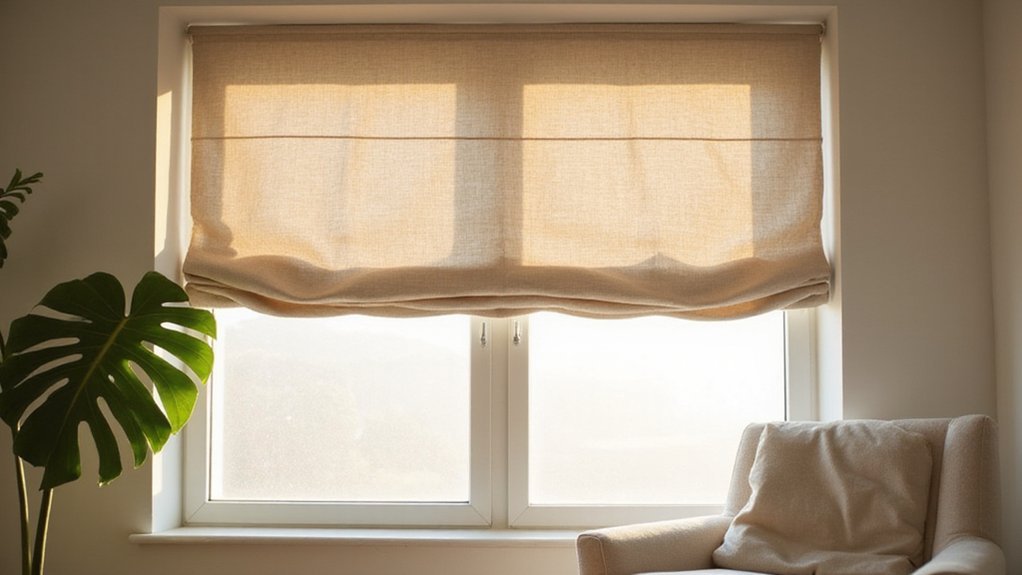
If you’re wondering how to create your own Roman window shades, you’re in the right place. Making DIY shades can be a fun and budget-friendly way to customize your space.
With a few simple steps, you’ll be able to craft stylish, functional window treatments yourself. Keep reading to learn the key techniques that will turn your project into a success.
DIY Roman Shades: The Complete Beginner’s Guide
Choosing the right fabric is crucial for your DIY Roman shades. Opt for medium-weight, tightly woven materials like linen-cotton blends or decorator weight fabrics. These fabrics provide durability and stability, helping your shade keep its shape over time. Your face fabric should be 14 inches longer and 3 inches wider than the finished shade to accommodate the folds and fullness. Color coordination matters—pick a fabric that complements your room’s decor to create a cohesive look. Using a structural mounting board such as a 1×2 wood board ensures the shade has a stable base for attachment and operation. For a typical queen bed setup, a finished shade width of 60 inches is a common fit to consider for window coverage. To maintain the fabric’s freshness, you can apply a gentle hand washing technique similar to that used for silk pillowcases. For a stable installation, it is important to secure the board to the window frame using screws.
Next, measure and cut your lining into 2-inch strips to form the dowel casings. Position plastic shade rings 3 inches from each edge, then space them 10 inches apart along the width of the fabric. Start the first row of rings at a one-inch mark from the edge, ensuring even placement. Proper spacing and placement of rings are essential for a smooth operation and a professional appearance.
How to Measure Your Window for a Perfect Fit
To measure your window for a perfect fit, follow these precise steps. For inside mount shades, measure the width at three points: the top, middle, and bottom of the frame. Record the measurements to the nearest eighth of an inch. Use the smallest of these three measurements as your final width to ensure a snug fit. Next, measure the height from the left, center, and right sides of the frame, rounding each to the nearest eighth inch. Select the longest height measurement for accuracy. Always record measurements in the order of width first, then height, using the format W x H.
For outside mount shades, measure the width across the desired coverage area, not just the frame. Add at least 1.5 inches to each side of the measurement to allow for overlap and proper coverage. When determining the mounting height, position the top of the shade approximately 3 inches above the window frame. Measure straight down to the windowsill or 2 inches below it, depending on your preference for coverage. Precise measurements are vital for selecting the right fabric and ensuring durability. Avoid rounding up the width to prevent gaps, and measure each window individually to accommodate size variations. For safety and comfort, consider choosing bed rails that meet similar rigorous measurement standards. Measure the exact window opening at multiple points to ensure consistent size before any fabrication. Use a steel measuring tape for the most accurate results. For a calming atmosphere, consider placing a rock salt lamp near your window to complement the natural light.
Tools and Materials You’ll Need for Roman Shades
You’ll need stitch witchery tape, nylon string, and nine plastic rings. For the cord mechanism, gather pulleys, a cord lock, eye hooks, and L-brackets. Marking tools include a pencil, ruler, measuring tape, and a 1/4-inch seam guide. Additionally, have staples, a hammer, drywall anchors, fabric glue, and a clamp on hand. These essentials ensure your Roman shade project proceeds smoothly and securely. The fabric should be cut 2 inches wider and 7 inches longer than your desired shade dimensions to allow for hemming and dowel casings.
Build the Shade Board and Cut the Fabric
Cut the mounting board to fit snugly inside your window frame. Deduct 1/4 inch from the narrowest width measurement to ensure a proper fit. Cut the 1” x 2” mounting board slightly shorter than this measurement to allow for secure attachment without forcing the fit.
For the fabric, iron both the front and lining to remove wrinkles and ensure smooth cuts. Cut the front fabric 3 inches wider and 5 inches longer than your window’s dimensions. The lining should match the sheathed height but be 1 inch narrower than the final width, allowing for a neat appearance when assembled. Secure a fabric-covered mounting support board just above the shaping line for added stability.
Align the board with your height markings on the fabric, then wrap the excess fabric around the edges. Staple the fabric firmly on the back of the board, keeping the fabric taut for a clean, tailored look. Center the lining over the front fabric, leaving about an inch of fabric on each side. Staple it securely in place, ensuring it is straight and evenly aligned. Trim any extra fabric, then hammer down the staples flush to avoid snagging or uneven surfaces.
Make Dowel Casings and Attach Rings the Easy Way
To make dowel casings and attach rings easily, start by marking the dowel positions and sewing the casings first. Use 1-inch by 2-inch wooden boards, cut slightly less than your window width. Cut matching wooden dowels to this exact length. To determine casing spacing, subtract 3 inches for the top staple zone from your fabric height, then divide the remaining length by your desired number of folds. Mark the first pocket about 7.5 inches down from the initial fold. For a finished product, dowel lengths are cut 1 inch shorter than the total shade width to ensure smooth insertion and fit. A steel measuring tape is ideal for verifying these window and dowel dimensions with accuracy.
Construct the casings by folding each 2-inch strip in half, then ironing it flat. Sew the open edge with a ¼-inch seam allowance. If you prefer a no-sew option, apply Stitch Witchery or another fusible adhesive, then press it in place and sew for extra security. For attaching rings, hand-sew three plastic rings onto each casing: one in the center and one approximately two inches from each end. This ensures your vertical cords will run straight, leading to smooth operation of the shade.
Hem, Line, and Sew Your Shade
To hem your shade’s bottom, start by folding the fabric 1/4 inch up and pressing it flat. Then fold it again by 1 1/4 inches to hide the raw edge, creating a clean, polished finish. Sew this hem with a straight stitch; because it will be visible from the front, choose thread that closely matches your fabric color for a seamless look. This creates a 3″ hem for a rod pocket to fit a weight bar, securing the bottom of the shade. To keep your down pillow fresh, wash it every six months to prevent dust mites and odors. For a proper fit in your bedroom, consider whether a full or queen mattress will best suit your available space and comfort needs. Using budget-friendly tips from a related guide can help you save on materials for this project.
Next, prepare the dowel casings from lining strips. Cut two strips that are 2 inches wide and match the full width of your shade. Fold each strip lengthwise, press them flat, and sew along the raw edges with a 1/4-inch seam allowance. Iron the finished casings to ensure they lie flat and smooth during installation. This step ensures precise spacing and a professional appearance for your shade.
Convert Mini Blinds Into a Roman Shade Mechanism
To convert mini blinds into a Roman shade mechanism, start by removing the blinds’ components. Snip all vertical strings holding the slats, but keep the lift cords intact. Next, take out the ladder-shaped strings and pull off all plastic slats. This preparation makes future repairs easier. Use fabric glue that dries clear to secure hems and attach slats to the fabric panel fabric glue. Ensure the lift cords are not twisted to avoid uneven hanging. For best results, follow a regular cleaning routine to prevent mold and bacteria buildup. A budget-friendly tip is to repurpose old mini blinds instead of buying new hardware.
For cord routing, cut the three bottom cords so you can slide the bottom bar off and free the slats. Measure your fabric to be three inches wider and four inches longer than your finished shade. Lay the mechanism on the fabric, using the cords as a guide to mark fold lines with pencil X’s. Measure eight inches up from the bottom on each cord and mark where to attach the rings. Sew drapery rings at these points for an even, controlled fold. Glue the top of the mechanism to the fabric panel, and position the bottom slat about eight inches above the fabric’s true bottom to create a neat fold at the bottom of your shade.
Install the Cord Lock and Thread the Cords
Feed each cord individually through the gap and into a designated bottom slot. Then, pass each cord from the opposite side through the rollers, making sure not to mix them. For a 10-cord lock, string all cords through the same opening. Pull the cords down to open the shade. To lock it, pull the cords to the right, and to release, pull them to the left. Before proceeding, verify that the lock is secure to ensure proper operation. Ensure the loose roller is tilted away to create a gap for easier threading. Unlike cotton sheets, microfiber options are typically more budget-friendly and resist wrinkling. For accurate measurement, always measure the width at the top, middle, and bottom of the window to account for any irregularities. For consistent cord tension, consider using top rope lights to illuminate the work area and clearly see each cord path.
Train Your Pleats for Perfect Folds
To train your pleats for a lasting crisp fold, start by temporarily holding the shape with hair clips as you manipulate the fabric by hand. Once satisfied with the placement, secure the pleats with a ribbon, tying them tightly to maintain the fold. Leave the ribbon in place for at least 48 hours to allow the fabric to develop “fabric memory,” which helps it retain the shape naturally. For thicker fabrics such as velvet, extend this resting period to about a week to ensure the pleats hold firmly. After the waiting period, gently shake out the fabric and examine the pleats. If they have lost some of their crispness, re-secure the pleats with ribbon and repeat the process to achieve the desired sharp fold. Consider how ceiling light fixture installation requires similar patience for securing wires and parts. Ensure you mark baseline and pleat lines with pencil for accurate pocket placement before training the pleats. For a smooth process, treat the fabric like a duvet cover that needs careful alignment and temporary fastening.
Hang Your Roman Shade and Adjust for Fit
To hang your Roman shade and ensure it fits properly, start by choosing between inside and outside mounting. For inside mounting, verify that your window frame can handle pilot holes and mark the bracket locations accordingly. Drill at each mark carefully. For outside mounting, find a flat surface, use a level for precise alignment, and pre-drill into the headrail to prevent splitting. Consider adding a memory foam mattress topper for enhanced comfort while sleeping after a long day of DIY projects.
Next, check the horizontal alignment of the brackets by placing a level across them. If the bubble isn’t centered, adjust by gently tapping the higher bracket downward. Loosen its screws for micro-adjustments, then tighten again. Confirm that the brackets are evenly spaced and do not interfere with the shade’s control mechanism. When securing the mounting board, ensure the shade is square on the board so it hangs level and parallel to the window sides, as square alignment prevents a crooked appearance.
Finally, test the shade across its full range of motion. Use the same level of accuracy as in curtain rod measurement to ensure everything is aligned. Operate it multiple times to ensure smooth movement without snags. For cordless shades, gently push up or pull down to verify ease of operation. Mount the cord cleat high above reach and wrap any excess cord in a figure-eight pattern for safety. Before finishing, double-check that all components are secure for safe and proper use.