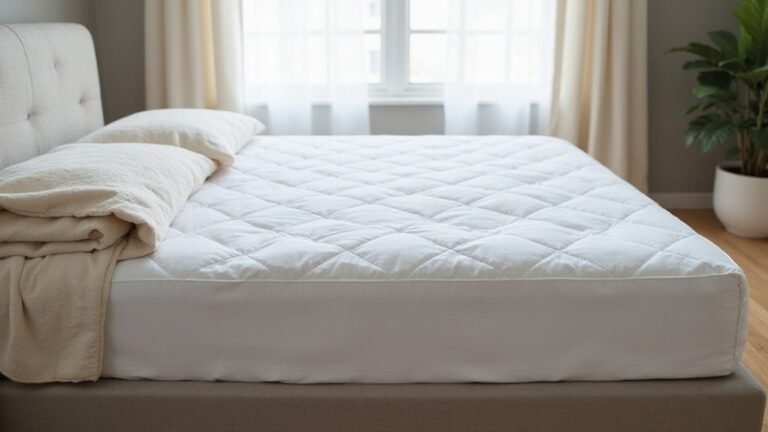
Ever wonder if you can just toss your mattress protector in the wash without damaging it? The good news is, most protectors can be cleaned safely with a few simple steps.
Washing correctly helps maintain its waterproof layer and prolongs its life.
Keep reading for easy tips on how to get your protector fresh without risking damage.
Why Checking the Care Label Saves Your Mattress Protector
Checking the care label before washing your mattress protector is essential to prevent damage. The label provides clear instructions on temperature limits and symbols that guide proper fabric care. For example, a crossed triangle indicates “no bleach,” while a crossed circle means dry cleaning is not allowed. If the label is missing, default to cold water and gentle cycles to minimize risk. It also warns against using harsh chemicals that could damage the waterproof backing. The label informs you if hand washing is necessary or if machine washing is safe. Ignoring these instructions can cause stiffening of fibers or melting of polyurethane membranes. Always read the label first to ensure your mattress protector stays protected and functional. Just as a buyer’s guide for accent chairs emphasizes checking construction details, the care label highlights crucial maintenance steps. For best results, allow the unit to stabilize before cleaning to prevent fabric stress. Knowing the queen size dimensions helps you choose a protector that fits snugly without bunching.
Machine Wash Settings That Protect the Waterproof Barrier
To protect the waterproof barrier, set your washing machine to a gentle cycle with cool water, ideally below 30°C. Use only a quarter of the mild, bleach-free detergent you would normally add, and opt for liquid detergent for better dispersal. Avoid fabric softeners completely, as they clog membrane pores and reduce breathability. Run a second rinse cycle to remove any detergent residue that could impair the waterproofing. Wash your protector alone to prevent snagging on fastenings, and never overload the drum to allow free movement and even wear. Always follow included care instructions for optimal performance. Following these steps helps maintain the integrity of your waterproof barrier, ensuring it performs effectively over time. For bedding items like down comforters, you should also use a front-loading machine to prevent damage from an agitator. While you focus on the care of your protector, selecting the correct mattress size also impacts how well your bedding fits and functions. A standard twin mattress is typically 38 inches wide and 75 inches long, which can influence your choice of protector dimensions.
How to Hand Wash a Mattress Protector Without Damaging It
Hand washing a mattress protector offers gentler cleaning control and is less likely to damage the waterproof layer. This gentle approach is similar to the care recommended for fleece knot blankets to preserve their softness and structure. Use cool water and a mild, bleach-free liquid detergent—about one teaspoon per gallon of water. Fully submerge the protector and gently knead it without rubbing or wringing. Let it soak for 10 to 30 minutes, then rinse with cool water until no suds remain, pressing out any soap residue. To remove excess water, roll the protector in a clean towel and press firmly—never twist or wring. For drying, lay it flat or hang it in a well-ventilated area, avoiding direct sunlight. Once fully dry, fold it properly for storage to maintain its shape and longevity. When selecting a mattress protector, consider that full and queen mattresses differ in cost, comfort, and everyday use.
How to Spot Clean Stains Without Making Them Worse
To spot clean stains on your mattress protector without making them worse, start by rinsing the visible stain with cold water to lift it. Gently dab the area with a mild detergent solution, working from the outside inward to prevent spreading. Avoid rubbing, as this can damage the fabric. For biological stains like urine or sweat, apply an enzyme cleaner or vinegar-water solution to ensure safe cleaning. Allow the treatment to sit for at least 30 minutes. Then, wipe the area with a clean, damp cloth to remove any residue. Always blot excess moisture instead of wringing, to protect the waterproof layer beneath. Consider using a chunky yarn dabbing motion for gentle pressure to avoid damaging the fabric. Repeat the process if needed, but before drying, inspect the stain carefully to avoid setting it further. Similar to the approach for using a Vicks dehumidifier, maintaining consistent airflow during drying prevents moisture buildup and helps your protector dry faster. This approach is similar to caring for down alternative bedding, which also requires gentle cleaning to maintain its comfort and durability.
Best Drying Methods for a Waterproof Mattress Protector
After spot cleaning, it is crucial to dry your waterproof mattress protector properly to maintain its waterproofing and shape. For tumble drying, always select the lowest drying temperature, such as your dryer’s delicate or low cycle. This gentle heat prevents damage to the waterproof membrane and avoids shrinking. To speed up the process, add a couple of clean, dry towels to the dryer; they help absorb moisture and reduce dry time. Remove the protector immediately when the cycle ends to prevent heat from harming the fabric. Never use fabric softeners because they can clog the fabric’s pores and compromise the waterproof layer.
For air drying, spread the protector on a rack or clothesline in a well-ventilated area. Keep it out of direct sunlight to prevent fading or damage from UV rays. Turn the protector every few hours to promote even drying. Expect this process to take between one and two days, depending on humidity and airflow. Whatever drying method you choose, ensure the protector is completely dry before placing it back on your mattress to maintain its waterproof features and prevent mold or mildew.
Why Hot Water and High Heat Ruin the Waterproof Layer
Hot water and high heat damage the waterproof layer by causing thermal degradation in rubber-based polymers. When exposed to high temperatures, these polymers soften, which weakens their tensile strength and creates tiny pinholes that compromise the barrier. If you then dry the protector with high heat, the softened material cools and becomes brittle, increasing the risk of cracks. These cracks allow water to seep through, defeating the purpose of the waterproof layer. Repeated heating and cooling cycles accelerate this damage, leading to failure within about two years. To preserve the waterproof qualities, always wash with cold or warm water and dry on low heat. This gentle treatment helps maintain the membrane’s elasticity and prevent costly replacements. Penetrating sealers effectively reduce surface absorption in masonry, yet cannot bridge cracks or gaps.
How to Get Musty Smells Out After Improper Drying
To eliminate musty smells after improper drying, start with baking soda as your primary solution. Sprinkle a generous, even layer over the entire mattress protector, focusing on areas where odors are strongest. Leave it on for at least two hours, or overnight if the smell is particularly stubborn. Vacuum thoroughly to remove all the baking soda residue.
For persistent bacteria or mold spores, combine equal parts distilled white vinegar and water in a spray bottle. Lightly mist the surface—avoid saturating it—and then allow it to air dry in a well-ventilated space. The vinegar odor will dissipate once the fabric is completely dry. For an extra fresh scent, add a few drops of lavender or tea tree essential oil to the baking soda before applying. Enhancing airflow and sunlight exposure can also quicken drying and help prevent odors from returning.
How to Reinstall for a Wrinkle-Free Fit on the Mattress
Once your mattress protector is clean and fully dry, reinstall it wrinkle-free by inspecting its shape and size. Unfold the protector completely and stretch it to match its original dimensions. Do not use a tumble dryer, as heat can cause shrinkage, which damages durability and may void the warranty. Consider stacking compact shoe racks near your entryway to keep footwear organized while your bedding is being refreshed. Confirm your mattress is clean and bare before fitting. For fitted protectors, align the soft side up and the shiny side down. Stretch the elastic corners over the mattress like fitting a sheet, pulling evenly to ensure a snug fit. Check each corner for tightness and adjust immediately if there’s any bunching. For zippered encasements, unzip fully, slide the cover over the top corners, then bend the mattress halfway to pull the cover down smoothly. Lift the mattress end to zip the cover shut completely. Adjust the corners to achieve a secure, wrinkle-free fit. If needed, place a polypropylene tarp between the protector and mattress to help slide the cover into place smoothly. Once fitted, remove the tarp, ensure the surface is smooth and tight, and then add your sheets. Reusing leftover materials from a budget-friendly DIY project can help you cut costs on home upgrades. Ensuring the protector covers the entire sleeping surface is crucial for consistent protection. This step is easier when you match the protector to your mattress using standard crib dimensions.
When to Replace Instead of Wash Your Mattress Protector
You should replace your mattress protector when it no longer provides effective protection, typically after 3 to 5 years of use. Key signs to watch for include persistent odors after multiple washes, stubborn stains that won’t come out, and visible tears or holes. Loss of waterproofing is another clear indicator—liquids can seep through, compromising your mattress. Frayed edges or fabric that has become thin and worn also suggest it’s time for a new protector. For allergy sufferers, replacing annually is recommended due to allergen buildup, even if no obvious damage is present. Don’t wait until bacteria or mold develop; replace immediately after heavy spills, illnesses, or signs of degradation. Always consult the manufacturer’s guidelines, but prioritize replacement when these indicators are present over simply going by age.