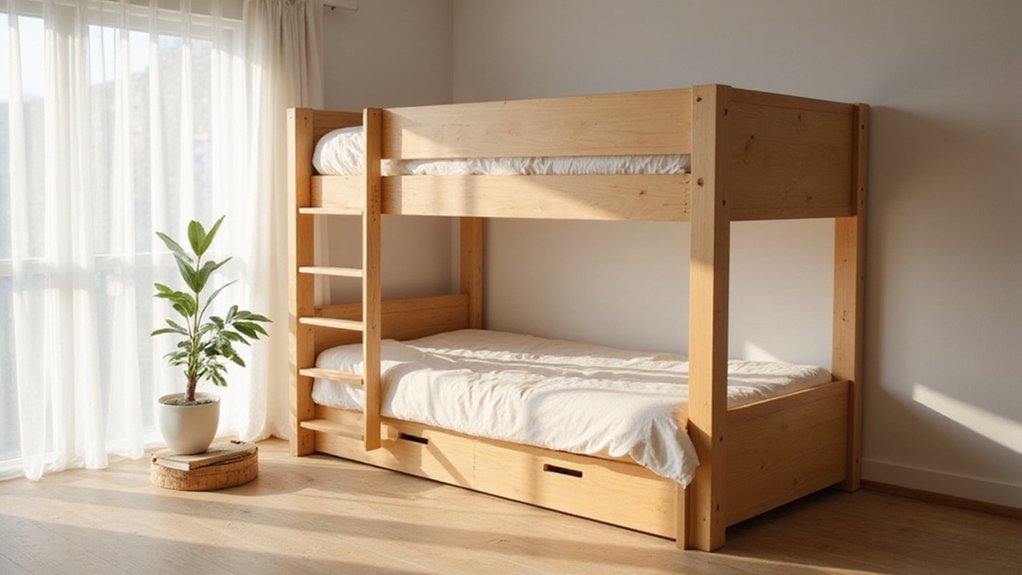
Looking to build a sturdy, custom loft bed yourself? With basic lumber like 2x4s and 2x6s, you can create a safe and comfortable space up high.
From constructing the frame to adding guardrails and a ladder, this DIY project offers a practical way to maximize your room.
In the sections below, you’ll find step-by-step instructions to help you bring your loft bed idea to life.
This will ensure it’s both functional and stylish.
Materials and Tools for a Sturdy Loft Bed Frame (With Sizes)
For a sturdy loft bed frame, start with the appropriate lumber. You’ll need three 2x6x8 boards for the main structure, providing strong support for the bed’s frame. Eight 2x4x8 boards are essential for slats and leg reinforcement, ensuring stability and even weight distribution. Two 1x10x8 boards serve well for side rails or decorative touches, offering durability and aesthetic appeal. To further enhance stability, anchor the frame into wall studs using 3 or 4-inch screws for a secure connection. A standard queen mattress measures 60 inches wide by 80 inches long, so adjust your frame dimensions accordingly. Adding a duvet cover over your mattress can protect it and enhance bedroom comfort. If you prefer a larger sleeping surface, California King dimensions provide an extra 4 inches in length.
Tools required include a drill, circular saw, and clamps for precise cutting and assembly. Use 4-inch screws to securely join main components and wood glue for extra stability at joints. For connecting slats and reinforcing the frame, 3-inch screws are recommended.
To add a decorative touch, consider staining or painting the 1×10 boards, giving your bed a personalized look. Incorporate storage solutions by adding plywood shelving between the legs for space-efficient organization. When building the ladder, use 2 ½-inch wood screws for rungs, while 10 decking screws per side support provide extra strength to the structure. Metal brackets are also useful for aligning components accurately and maintaining a straight, stable frame. Protect your bed with a safety railing to prevent falls during sleep.
How to Build L-Shaped Legs That Won’t Wobble
To build L-shaped legs that won’t wobble, you should join a 70-inch 2×6 board with a 70-inch 2×4 board to form a strong butt joint that resembles a capital “L” from the end. Using the right materials is crucial: select a smooth, straight 2×6 for the horizontal base to ensure a broad footprint that provides stability, and a 2×4 for the vertical support to handle weight efficiently. Apply wood glue to the butt surfaces, then clamp the two boards together, making sure they are flush. Drill pilot holes to prevent splitting and drive six screws at 12-inch intervals into each leg, which creates a tight and torque-free connection. The wide 2×6 base anchors the leg against side-to-side wobbling, while the vertical 2×4 supports the frame’s weight. Double-check that the edges are aligned properly to keep the joint square before tightening the screws. This sturdy design is similar to the mini crib sizing principles found in bedding guides, where a broad base prevents tipping and ensures a stable fit. For a consistent approach, you can treat the vertical support like slat cleaning to ensure no dust interferes with the bond. For long-lasting results, you should also fluff the down after securing the frame to maintain even support.
Assemble the Main Frame and Attach the Slats
Attach the slats by applying wood glue and securing each end with two 1-1/2-inch screws. Cut the slat strips about 5 millimeters shorter than half the bed’s width to ensure a proper fit. Screw the slats directly to the supports, making sure they are level before tightening. Verify that all corners are square before proceeding. Once everything is aligned and secure, finish by applying a durable paint finish to protect the frame and improve its appearance. This creates a sturdy, ready-to-use loft bed base. For a comfortable sleep environment, consider that a dehumidifier reduces excess moisture in the air to prevent mold and mildew. Additionally, using an air purifier can help capture airborne allergens and dust for cleaner indoor air. Since a loft bed is often placed in a small room, think about whether you truly need a dedicated changing table or if the bed’s surface can serve that purpose.
Construct the Ladder With Reinforced Steps
Measure the vertical distance from the floor to the top of your loft bed frame. Use this measurement to cut your 2″ x 4″ or 2″ x 6″ side rails to the exact length needed. For a comfortable climb, maintain an 18-inch width and cut the rails at a 20-degree angle. Cut five 2″ x 6″ step boards, spacing them 12 inches apart vertically, leaving 12 inches of clearance above and below the steps. Drill clean holes using a 1 1/4 inch Forstner bit, then sand the edges thoroughly to prevent splinters. For a smooth surface, fill deep-set screw holes with wood putty before applying any finish. Apply wood glue to each outer 1 1/2-inch width of the steps, then tap the boards flush with a mallet. Secure each step with three 3.5-inch screws on each side, ensuring a sturdy and rigid ladder. To prevent splitting, drill pilot holes before screwing in the fasteners. Once assembled, sand all surfaces using 80, 120, then 220 grit sandpaper for a smooth finish. Similar to installing a window unit, correct leveling is crucial for stability to avoid wobbling or stress on the joints. Conduct a safety check on every joint and fastener. When satisfied with the stability and finish, proceed with decorative touches, avoiding guardrails or wall mounts within this step. For a cohesive look, consider matching the ladder’s step spacing to the height of your bedside table for easy access. To keep the ladder clean and fresh, it can be wiped down with a mild detergent, just as down comforter care requires gentle handling to avoid damage.
Finishing a Sturdy Loft Bed: Trim, Guardrails, and Wall Mounts
Once the ladder is assembled and sanded smooth, you can proceed with finishing your loft bed with trim, guardrails, and wall mounts. Start by installing quarter round trim along all plywood edges to create a finished, polished look. Apply wood filler over all screw holes and corners, then sand them smooth to ensure a seamless surface. When attaching guardrails, ensure the top edge sits at least 5 1/2 inches above the mattress top for safety, with the bottom pipes level with the mattress. Tighten the set screws at the top of each pipe to lock them securely in place. Slide guardrail pipes onto castings on guardrail posts and align holes before tightening the set screws. For a similar polished finish, consider adding a vanity with lit mirror to your workspace or storage area beneath the bed. For a budget-friendly approach, you can reuse old crib parts to save on materials and costs. To ensure nighttime reading comfort, consider adding a bedside lamp that provides focused light without taking up valuable surface space.
Use 5-inch lag screws with washers to secure the bed to wall studs, driving at least two screws into each stud for maximum stability. Add diagonal corner braces for extra reinforcement and safety. For a clean, finished appearance, insert plugs into the guardrail pipe holes, covering the fasteners and preventing dust accumulation. If you decide to paint, choose a durable finish that matches your room décor and withstands wear and tear. These finishing touches not only improve safety and appearance but also create opportunities for added storage beneath the bed, such as bins or a workspace.