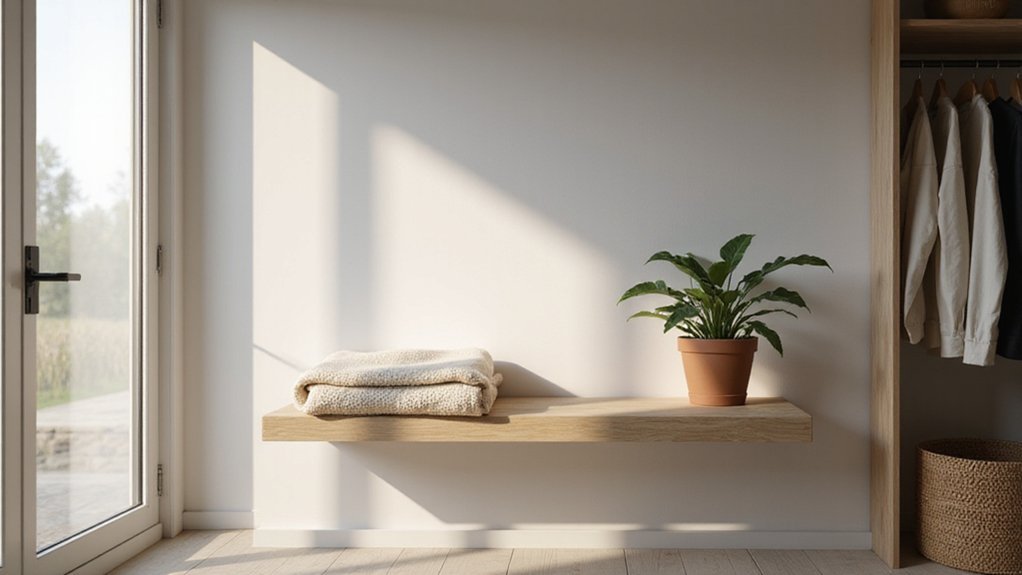
Looking to add shelves to your closet but unsure where to start? The key is careful planning, using the right materials, and taking your time to get everything level and secure.
By following a few straightforward steps, you can create sturdy, attractive shelves that organize your space efficiently.
Keep reading for simple instructions to turn your closet into a well-organized oasis.
Choose Melamine and 1×4 Lumber for Your Closet Shelves
Melamine is your best choice for permanent closet shelves because it resists sagging better than MDF. Use 3/4-inch thick, 15 3/4-inch deep panels for a sturdy foundation. To achieve a clean, seamless look, fill seams with painter’s caulk and conceal brad holes with white wood putty, ensuring a professional finish. Reuse MDF scraps from door casing to minimize waste. Ensure your shelf depth is compatible with standard queen mattress dimensions if the closet will store bedding items. Unlike a vanity, a shelf requires no additional desk or mirror investment, keeping your project budget lower. Consider adding a rock salt lamp to your space for its calming ambiance and air-purifying benefits.
Always cut melamine with a fine-toothed saw blade to prevent chipping. Attach 1×4 lumber cleats—3 1/2 inches wide for shelves with rods, 1 3/4 inches without—using construction adhesive and brads. Secure these cleats to wall studs or use appropriate anchors to keep shelves sturdy. For walls wider than 6 feet, add a center support board to maximize stability and keep your shelves level over time.
Measure Your Closet Walls and Plan the Shelf Layout
Start by measuring your closet walls accurately—this ensures your shelving fits perfectly. Record the height from floor to ceiling, the usable wall space lengths on both the back and side walls, and the depth from the front opening to the back wall. Measure the width at three vertical levels: low, middle, and high. Use the smallest of these measurements for your final shelf plan to prevent overestimating available space. Similar to how you would cut blackout fabric for windows, precise measurements prevent material waste. When planning your layout, remember that a bed platform typically offers a lower profile than a traditional frame, which can influence the height of adjacent storage. To avoid sagging under heavy storage, choose shelves made from solid wood or a high-quality engineered alternative.
Be mindful of obstructions such as baseboard molding, soffits, or door frames that can limit shelf placement. Consider using 3/4 inch MDF sheets as your primary shelving material for their affordability and ease of cutting. Mark access panels and any irregular wall features on your diagram to avoid surprises during installation. Next, determine clearance needs: your shelves should have at least 24 inches of depth, and you should allocate 12 inches of vertical space for folded clothes. Set the top rod at 84 inches from the floor for double hanging storage.
Finally, create a template by tracing your wall contours on cardboard. Use this to verify shelf lengths and placements before cutting. Sketch your cut list with precise shelf dimensions from the template to ensure accuracy. This detailed planning stage provides you with a clear blueprint to build an organized and functional closet.
Find Studs and Position the Top Shelf Supports
To find the wall studs, you need to locate their position behind the drywall because they serve as the strongest anchor points for your shelves. Use a stud finder to detect the denser wood within the wall—this device is quick and reliable. If you don’t have a stud finder, knock along the wall with your knuckles; a solid, high-pitched sound indicates a stud’s location. You can also sweep a strong magnet across the wall; it will stick to the metal drywall fasteners attaching the sheetrock to the studs. Once you identify the first stud, measure 16 inches from its center to find the next one, since standard spacing typically follows this pattern. Mark each stud’s center at your desired shelf height to ensure supports are installed securely. Position your top shelf supports over these marks, making sure they are level to keep your shelves from tilting. Resist the temptation to rely on hollow drywall anchors, as they lack the strength needed for supporting heavy shelves. If you have difficulty finding the first stud, you can probe with nails to verify its location behind the sheetrock. For a more organized entryway, consider how entrance shoe rack designs prioritize sturdy wall mounting to handle daily use. For a baby room, a top-rated dresser with change table combines stable shelving with safe, durable construction for daily use. This secure mounting approach mirrors how a duvet coverlet provides a snug, protective layer to keep a bedroom cozy and well-maintained.
Cut and Install 1×2 End Supports for Stability
Cut your 1×2 boards to the length needed for your closet’s depth. Pre-drill holes about 2 inches from each end to prevent splitting. Apply a thin bead of wood glue along the back of each 1×2 to strengthen the bond with the shelf surface. Hold the strip against the wall, aligning its top with your level line, and check for plumb. Secure the support to at least one stud with wood screws that penetrate 1 to 1.5 inches into the stud. If the ends are unsupported, install drywall anchors before driving screws. Use a level to verify vertical and horizontal alignment, then add the second screw. For extra rigidity, attach support brackets to the 1×2 ends, making sure they are level before final tightening. This setup prevents sagging and ensures your shelves stay stable over time. Ensure bracket holes align with marked studs for secure mounting. As with any installation, pre-drilling holes helps prevent the wood from splitting when driving screws.
Attach Shelves to Supports and Handle Off-Center Studs
To attach your shelves securely, start by confirming that the 1×2 end supports are firmly installed. Use a stud finder to locate and mark the positions of the studs in your wall. If the studs are off-center, do not force the mounting brackets to align with them; instead, reposition the brackets to match the actual stud spacing. Between studs, choose appropriate wall anchors rated for your shelf’s weight. Heavy-duty anchors help distribute the load and prevent failure. Studs are spaced 16 inches on center, so you can measure from one discovered stud to reliably locate the next. Drive screws at least 1 inch into the studs for a secure hold, or install toggle bolts behind drywall for additional support. For a budget-friendly approach, consider using plywood and 2×4 lumber as an alternative to purchasing pre-made brackets. Before fastening the brackets, use a level to verify they are perfectly horizontal, ensuring the tops of both brackets are parallel. Tighten all fasteners securely, then slide your shelf onto the brackets. If necessary, tap the shelf gently with a hammer to seat it snugly, and you can nail it for extra stability if desired.
Space Shelves 14 Inches Apart for Storage Boxes
To space your shelves properly for 14-inch storage boxes, aim for a distance of 16 to 18 inches between each shelf. Measure the height of your boxes first and add at least two inches of clearance to allow easy sliding in and out without compressing their contents. Adjustable shelving can be especially helpful if your boxes vary in height, as it prevents overcrowding and keeps your closet organized. You can also wash mattress pads regularly to keep your bedding fresh and dust-free near the closet.
Consider decorative brackets that match your closet’s style while supporting the weight of full boxes. Label each box with a label maker or chalkboard tags for quick identification of contents. Place frequently accessed boxes around waist to eye level, reserving higher shelves for seasonal or less-used items.
Ensure the shelf depth matches the box depth, ideally at least 14 inches from the back wall, to prevent protrusion. This setup maximizes usability and makes it easier to maintain a tidy, accessible storage space.
Add Back Support Strips and Trim Before Finishing
First, add back support strips that are 1.5 inches shorter than the closet width to fit snugly between the side supports. Use 1×2-inch furring strips for this purpose, securing them with wood screws into the studs whenever possible. If studs are not accessible, reinforce with high-weight drywall anchors to ensure stability. These support strips prevent sagging and help stabilize your shelves over time, and additional back support enhances stability especially in narrower or wider shelves. For a finish that is as comfortable as it is durable, consider the breathable percale weave often used in high-quality bedding.
Next, install the trim. Begin with the top shelf by aligning one long trim piece so its top edge is flush with the shelf surface. For middle supports, run a single continuous trim piece across the entire row for a clean look. On the lower shelves, attach shorter horizontal trim pieces on each side, making sure all trim tops are even with the shelf surface. Use a nail gun or hammer and finishing nails to attach each piece quickly and securely. Always double-check that each piece is level and straight before finalizing to avoid an uneven, wonky appearance.
Fill Holes, Caulk Edges, and Prep for Paint
Once you have secured your back support strips and trim, the next step is to fill holes, caulk edges, and prepare for painting. For screw holes, use spackle and apply it with your fingertip for better control, patting the filler into the hole. Wipe away any excess immediately with a damp cloth to prevent over-application. Instead of sanding, gently rub dry spackle with a damp paper towel to smooth out the surface. This method speeds up the process and reduces dust. For a seamless and durable repair, consider using quick wood instead of traditional fillers, as it does not shrink or crack after drying. This approach aligns with the expert guidance on achieving a smooth finish before adding the quilt top. By following budget-friendly tips, you can save on material costs for the entire closet system. Maintaining proper humidity levels in the room can also prevent the wood filler from drying out too quickly or cracking.
Caulk all edges where the trim meets the wall or shelf to create a seamless look. Use a caulk gun and a steady hand to run a thin bead along each joint. Smooth the caulk with a damp finger or a caulking tool to ensure it blends into the surface without gaps or ridges. Focus on achieving a clean, even line for a professional finish.
If your shelves are white, the dried spackle will blend in seamlessly. For colored bookcases or stained wood, you’ll need to paint over the filled areas. To match the color, mix a small amount of your shelf’s paint into the spackle before applying, creating a custom tint. For tiny touch-ups, use a fine-tip brush to carefully cover the filled holes or seams. Before painting, mark the hole locations—these often indicate stud positions—and remove shelves to access all gaps. Wipe down every prepared surface to ensure the paint adheres smoothly and evenly.
Paint Closet Shelves With Swiss Coffee or Shiitake
Painting closet shelves with Swiss Coffee or Shiitake requires careful attention to color tone and lighting conditions. Since these hues emphasize warmth, your priority is preserving that inviting tone while steering clear of cool blue undertones that can make the finish seem dull or dingy. To achieve this, always test your paint on a small area first and observe how different lighting conditions—both natural and artificial—affect the color over several days. Lighting can shift the warmth, so verifying how the color appears throughout various times ensures you’re happy with the final look before fully committing. A full mattress, for example, measures 54 inches wide by 75 inches long, so a standard full size is ideal for a single sleeper who needs more room than a twin. For a cozy bedroom setup, understanding twin mattress sizes helps ensure the space feels balanced and not overcrowded. For optimal comfort, consider using cooling bed sheets to maintain a pleasant sleep temperature alongside your warm-toned shelves.
Maintain a tone-on-tone approach by using Swiss Coffee on both the walls and shelves for a cohesive appearance. Applying an eggshell sheen on the walls and a satin finish on the shelves adds subtle contrast without introducing cool tones. Avoid pairing the painted surfaces with stark white trim, as that can create a jarring pop of coolness that clashes with the warm hues. Instead, keep the overall palette consistent and let the gentle warmth of Swiss Coffee or Shiitake shine through for a harmonious, inviting space.