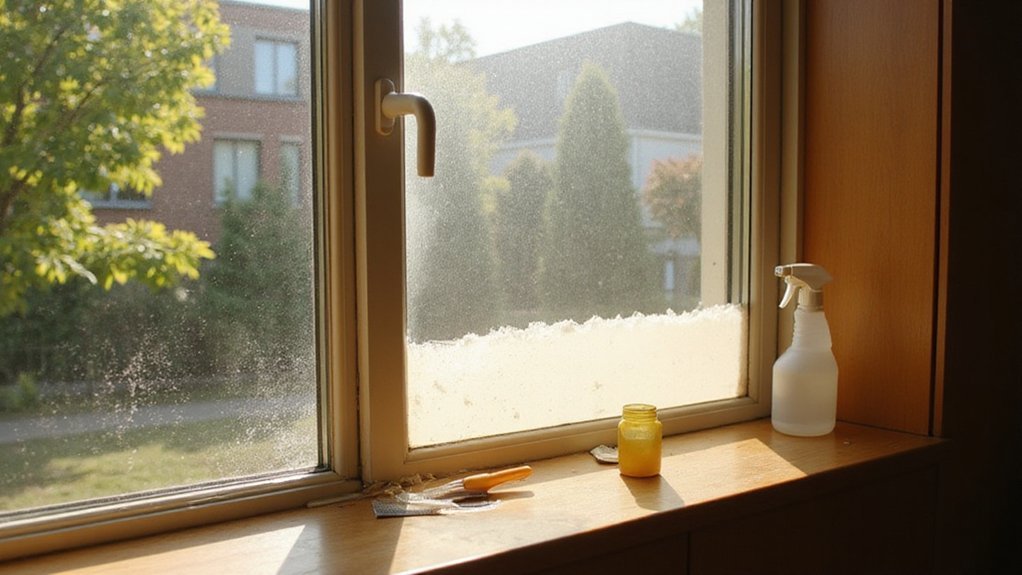
Removing window film can seem tricky, but with the right steps, it’s manageable. Whether you’re dealing with old tint or decorative film, the process mainly involves softening the adhesive and peeling it away carefully.
By the end of this guide, you’ll know how to loosen stubborn film, clean up leftover glue, and restore your windows’ clarity.
Keep reading to learn the step-by-step method to tackle even the toughest residue efficiently.
Use a Razor Scraper, Heat Gun, and Ammonia Cleaner to Remove Window Film
To remove window film effectively, follow these steps using a razor scraper, heat gun, and ammonia cleaner. Start by carefully lifting one corner of the film with the razor blade, holding it flat to avoid scratching the glass. Score the film into sections; this helps the cleaner penetrate underneath and loosens the adhesive. Keep the razor blade sharp by replacing it frequently to prevent scratches during scraping. Use the heat gun at a distance of 2 to 6 inches and move it back and forth for 30 to 60 seconds until the film warms up. Spray a generous amount of ammonia cleaner over the film and let it sit for about 10 minutes to break down the adhesive. Once the cleaner has soaked in, peel the film back at a 30 to 45-degree angle, applying heat as needed to ease removal. For any remaining glue, scrape it gently with a clean blade. Beginners should note that choosing a simple pattern can help focus on mastering technique rather than complex design. For reference, a queen mattress measures 60 inches wide by 80 inches long, but unlike glass work, standard bed frames require different fitting considerations. Finish by wiping the area with isopropyl alcohol and a microfiber cloth for a streak-free, clean finish. A budget-friendly approach to organizing these tools can be achieved by building a simple DIY storage bin rack at home.
Apply Heat and Solvents to Soften Stubborn Adhesive
Applying heat and solvents is effective for softening stubborn adhesive left on glass after removing window film. Use a heat gun set to low, holding it 8 to 12 inches away from the surface. Move the heat in circular motions over the adhesive to keep it pliable; direct heat ahead of your peeling to prevent re-sticking. Be cautious not to overheat a single spot to avoid thermal stress or glass damage. Alternatively, a steamer can be used on both sides of the glass to soften the glue with moisture. For particularly delicate areas, a cloth steamer is recommended for applying hot moisture safely. Using a heat gun on low is similar to the technique recommended for softening memory foam toppers, as both rely on gentle, even heat application to avoid material damage. This same principle of careful heat control applies when lowering a crib mattress to ensure your baby’s safety as they grow. Proper heat management is also essential for indoor air quality when using devices that may release fumes during cleaning.
For solvent treatment, spray a generous amount of ammonia onto the adhesive, then cover the area with a black plastic bag. Leave it in direct sunlight for 1 to 2 hours to trap heat and enhance the solvent’s effectiveness. This method encourages sustainable cleaning by minimizing harsh chemicals. Once the adhesive softens, carefully lift it away with a razor blade or scraper, being gentle to avoid scratching the glass. Finish by wiping the area with rubbing alcohol to achieve a clean, residue-free surface.
How to Peel Window Film Off Without Breaking the Glass
To peel window film off without breaking the glass, start by heating a corner with a hair dryer set to low or medium heat. Hold the dryer about 5 inches from the glass to soften the adhesive without risking thermal shock. Use a plastic scraper or your fingernail to lift the edge and create a small tab. Carefully pull the film slowly and evenly, frequently reheating the area ahead of your progress to prevent it from sticking again. Always maintain a low, steady angle when pulling and avoid jerking movements, which can cause tears or glass stress. During the process, spray the glass with soapy water to lubricate the adhesive and reduce static, helping prevent the film from sticking to itself. Move the heat source continuously to avoid uneven heating that could cause the glass to crack, and work patiently to minimize risk. Using two people makes handling the film easier and helps prevent creasing during removal. Maintaining proper humidity levels in the room can also reduce static buildup and make the adhesive easier to manage. If you prefer an alternative approach, consider using a plastic scraper designed for gentle adhesive removal to avoid scratching the glass surface. For rooms where you plan to install new fixtures afterward, selecting the right wall sconces can complement the refreshed appearance of your windows.
Scrape Away Adhesive Residue Left Behind by the Film
Once the film is removed, you’ll need to tackle the stubborn adhesive residue. Begin by generously spraying the affected area with adhesive remover until you see a yellow or purple color change, which indicates active glue. Let it soak for about 10–15 seconds to soften the bond. Use a razor blade scraper starting from the bottom of the window and work upward to prevent buildup. Flick thick, mucous-like globs off the blade toward the ground to keep your scraper clean. Alternate between soaking and scraping every 20 seconds to stay efficient, and use minimal force to avoid scratching the glass. For stubborn spots, apply medium heat from a hairdryer for 30–60 seconds before scraping to loosen the adhesive further. This heat application is similar to adjusting the crib mattress height for safer sleep. Windex also works well to dissolve the remaining glue, often faster than commercial products. Reapply the remover frequently as it can dry quickly. Finally, spray the window again and wipe it clean to remove any remaining adhesive residue. When handling adhesive after heat application, avoid common mistakes like applying too much pressure or rushing the process to prevent damage. Consider using a squeegee and cloth for final cleaning, as recommended in blackout curtain tutorials for streak-free results.
Use Stronger Solvents and Extended Heat for Film That Won’t Come Off
To remove stubborn window film that refuses to come off, you need to use stronger solvents combined with extended heat application. Fuel injection cleaners like Gumout or Berryman B-12 Chemtool are effective options—apply them generously and let them dwell for at least 60 seconds to soften the adhesive. Isopropyl alcohol at 70 percent or higher can also work quickly on acrylic bonds, but do not wipe it away immediately. Instead, give it a full minute to penetrate and loosen the adhesive. Applying heat is crucial; use a heat gun or steamer to warm the glass from both sides. The heat helps break down the glue line, making scraping easier. When working with solvents, always ensure the film is removed first, as solvent-based products outperform cleaning agents that lack solvent properties and leaving the film intact while applying chemicals can hinder their effectiveness. Use a plastic scraper to lift the film, avoiding scratches or damage to the glass surface. Patience and proper preparation are key when dealing with difficult adhesion. For spaces with high humidity that might interfere with adhesive removal, using a dehumidifier can help dry the environment and improve solvent effectiveness. Ensuring the workspace has adequate lighting helps you see remaining residue, much like how top vanity mirrors with lights enhance visibility for beauty rituals. If the project involves a small room where space is tight, you might consider that a twin mattress offers a compact sleeping solution that leaves more room for maneuvering.
Remove Every Trace of Glue and Polish Windows to a Streak-Free Shine
To remove every trace of glue and achieve a streak-free shine, start by spraying an adhesive remover generously over the affected area until the glue turns a highlighter yellow or purple. This color change indicates the remover is effectively breaking down the adhesive. Next, soak a piece of cotton wool with 75% isopropyl alcohol and hold it on the glue for a few seconds, allowing the solvent to penetrate and loosen the residue. After the brief soak, gently scrape the softened glue with a razor blade held at a shallow angle to avoid scratching the glass. Use a clean cloth to wipe away any dissolved glue residues. For a more consistent approach, you can follow the step-by-step process used for installing curtain rods to ensure thorough cleaning in stages. For a cleaner work area, first remove debris that could interfere with the process. Applying a budget-friendly DIY method can help avoid expensive professional services.
For stubborn remnants from old window tinting, apply a heat gun a few inches from the glass for a couple of minutes to soften the adhesive. Keep scraping from the bottom upward with fresh blades to prevent scratches and ensure thorough removal. When the glue is gone, spray the entire window with a dedicated glass cleaner, let it sit for a moment, then buff to a streak-free shine with a dry microfiber cloth. This process ensures your glass is completely clean and spotless, free of adhesive traces and streaks.